User Guide
Everything you need to know to get the most out of railreader2.
Getting Started
Download and install
The AI layout model is bundled in all packages.
- Linux: Download
railreader2-linux-x86_64.AppImagefrom GitHub Releases, make it executable (chmod +x railreader2-linux-x86_64.AppImage), and run it. - Windows (Microsoft Store): Install directly from the Microsoft Store for automatic updates, no SmartScreen warnings, and clean install/uninstall. The Store release may lag behind the GitHub release by a few days due to certification review.
- Windows (standalone installer): Download
railreader2-setup-x64.exefrom GitHub Releases and run it. Optionally associate.pdffiles during setup. This always has the latest version immediately.
Opening a PDF
Use File → Open or press Ctrl+O to open a PDF.
You can also pass a file path as a command-line argument.
When no file is open, a welcome screen shows with instructions.
First steps
Once a PDF is open, you can scroll through pages with PgDn/PgUp,
zoom with +/- or the mouse wheel, and pan by dragging.
When you zoom past 3x, rail mode activates automatically — this is
where the AI-guided reading begins.
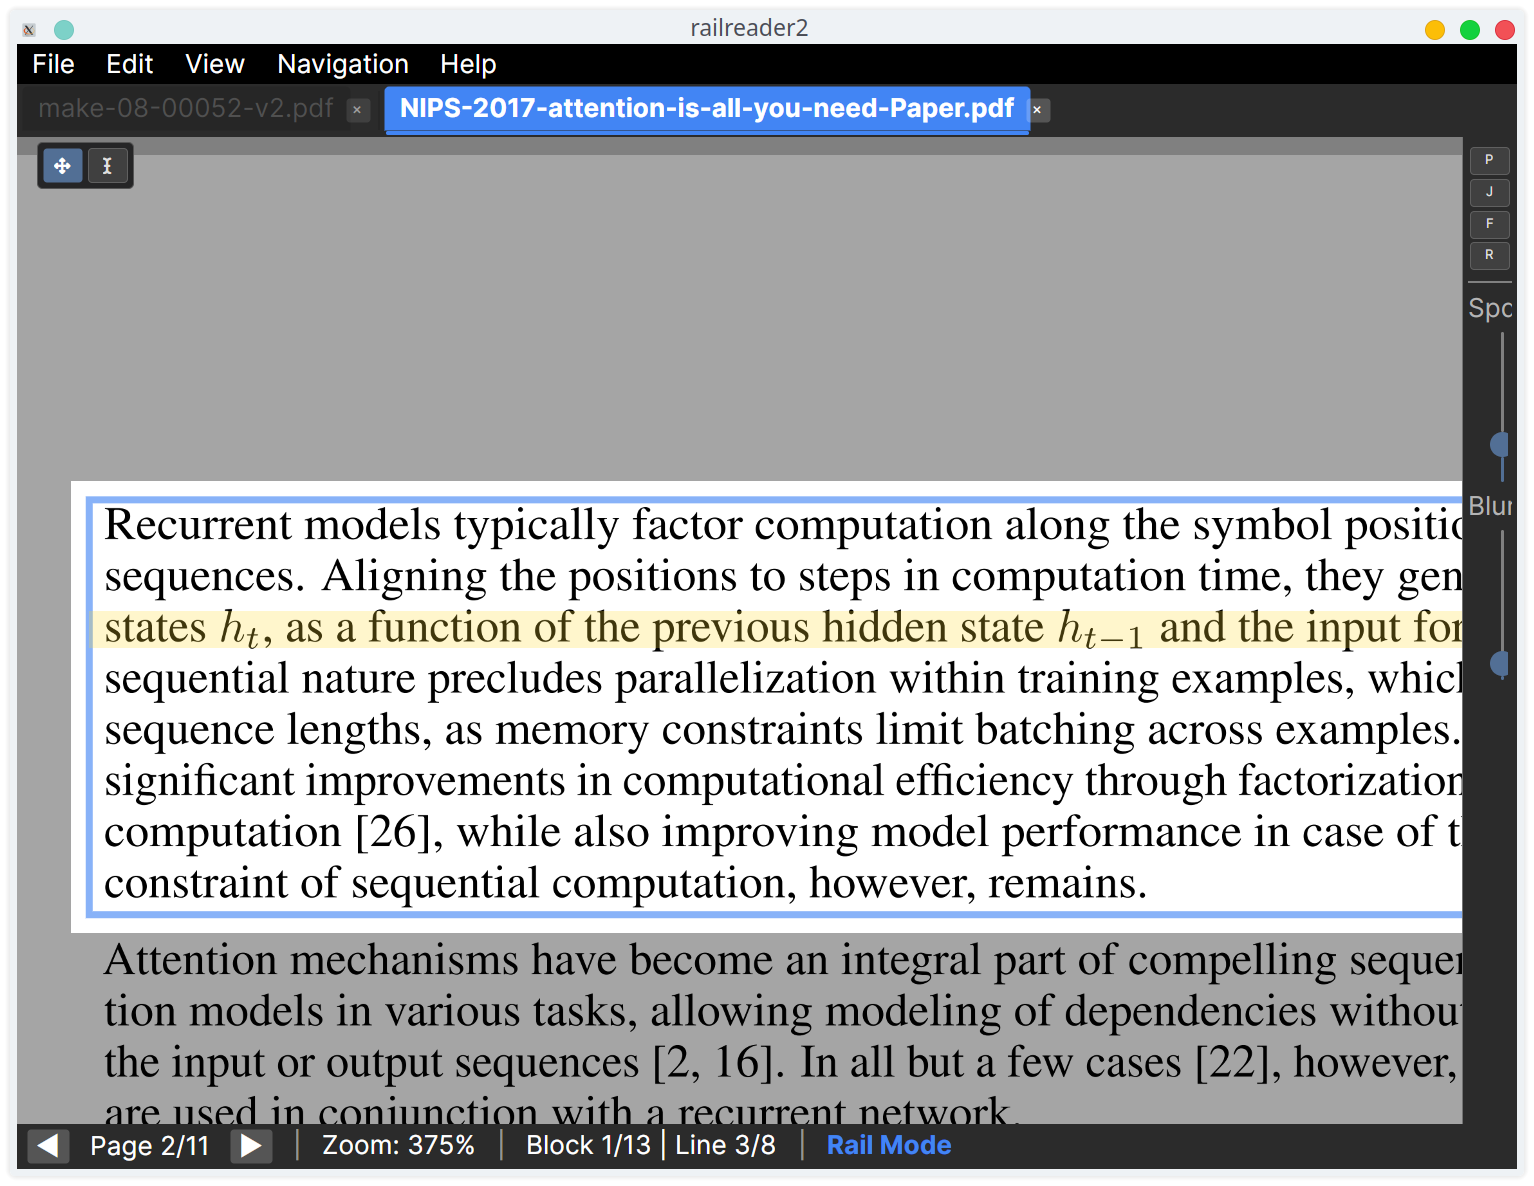
Rail Mode
Rail mode is the core feature of railreader2. When you zoom past the threshold (default 3x), the AI layout analysis detects text blocks and reading order, and navigation locks to those blocks. Non-active regions are dimmed so you can focus on the current block and line.
Line-by-line navigation
Down/S— Next lineUp/W— Previous lineRight/D— Hold to scroll forward along the lineLeft/A— Hold to scroll backwardHome/End— Snap to start/end of current line
When you reach the last line of a block, pressing Down advances to the next
navigable block. At the last block on a page, it advances to the next page. You can also
hold Down/S at the last line of a page to
advance to the next page automatically, without needing to release and re-press the key.
Click to jump
Click on any detected block in rail mode to jump directly to it. The view snaps to the clicked block's first line.
Horizontal scrolling
Holding Right/D scrolls horizontally along the current line with
speed ramping — it starts slow and accelerates. Ctrl + mouse wheel also
scrolls horizontally. The speed ramp time and max speed are configurable in Settings.
Free pan (Ctrl+Drag)
Hold Ctrl in rail mode to temporarily break out of rail constraints. While
Ctrl is held, you can pan and zoom freely as if rail mode were inactive. When
you release Ctrl, the view snaps back to the nearest rail position. This is
useful for quickly checking a figure, footnote, or other element outside the current
reading flow without losing your place.
Zoom position preservation
Zooming in and out preserves your reading position within the current line. The camera adjusts so the text you were reading stays in view rather than jumping to the block origin.
Shift+D to toggle the debug overlay, which shows
all detected layout blocks with their class labels, confidence scores, and reading order.
Useful for understanding why rail navigation behaves a certain way.
Auto-Scroll
Press P in rail mode to toggle semi-automatic auto-scroll. The
view flows through prose line by line on its own — but rather than running unattended
through the whole document, it parks (stops and waits for you) whenever it
reaches something worth pausing on, then continues at your signal. The easy, mechanical part
stays automatic; the “am I done with this?” decision stays yours.
- Where it parks: on arrival at a non-prose block — a display equation, table, figure, or heading — and at the end of a column and a page. Continuous prose flows straight through, even across paragraph breaks.
- Continuing: while parked, press
DorS(orRight/Down) to resume flow. A “Parked — press D to continue” hint appears in the status bar and on-page so a stop never looks like a freeze. - Inspect while parked: pan and zoom (and
Ctrl+drag free-pan) stay fully live while parked, so you can study a parked equation or figure for as long as you like. - Reading beat: within prose, a brief pause is held at the end of every line before moving to the next (default 400 ms). Raise the Snap duration (Settings → Rail Reading) if the move between lines feels too quick.
- What parks: the set of block types that park is configurable — Settings → Auto-Scroll → Park On (headings, equations, tables, figures by default; uncheck any to flow through it).
- Stop: press
Escape,P, or an opposing navigation key (Up,Left) to exit auto-scroll entirely.
The status bar shows an "Auto-Scroll" indicator while flowing and
"Parked — press D to continue" while stopped. Adjust speed with the rail
toolbar slider, [ / ] keys (±5), or Ctrl+[ /
Ctrl+] for fine adjustments (±1); holding D/Right
during flow temporarily boosts speed. Scroll speed is zoom-independent — reading pace stays
consistent at any magnification.
Auto-scroll trigger: Auto-scroll can also start automatically after sustained
horizontal scrolling. If you hold Right/D continuously for long enough,
auto-scroll engages and continues on its own when you release the key.
Jump Mode
Press J in rail mode to toggle jump mode. Instead of
continuous scrolling, Right/D and Left/A
perform saccade-style jumps — advancing by a configurable percentage of the visible width
(default 25%).
Hold Shift with Right or Left to perform a
short jump at half the normal distance. This is useful for fine-grained
positioning within a line.
This mimics natural reading eye movements and is useful for scanning text quickly.
Adjust jump distance with [ / ] or in Settings → Rail Reading.
Line Focus & Highlight
Line focus dim
When enabled, line focus dim applies a smooth feathered dimming overlay to the entire page except the active line in rail mode. Non-active lines fade toward the background colour, reducing peripheral distraction while maintaining a clean visual transition.
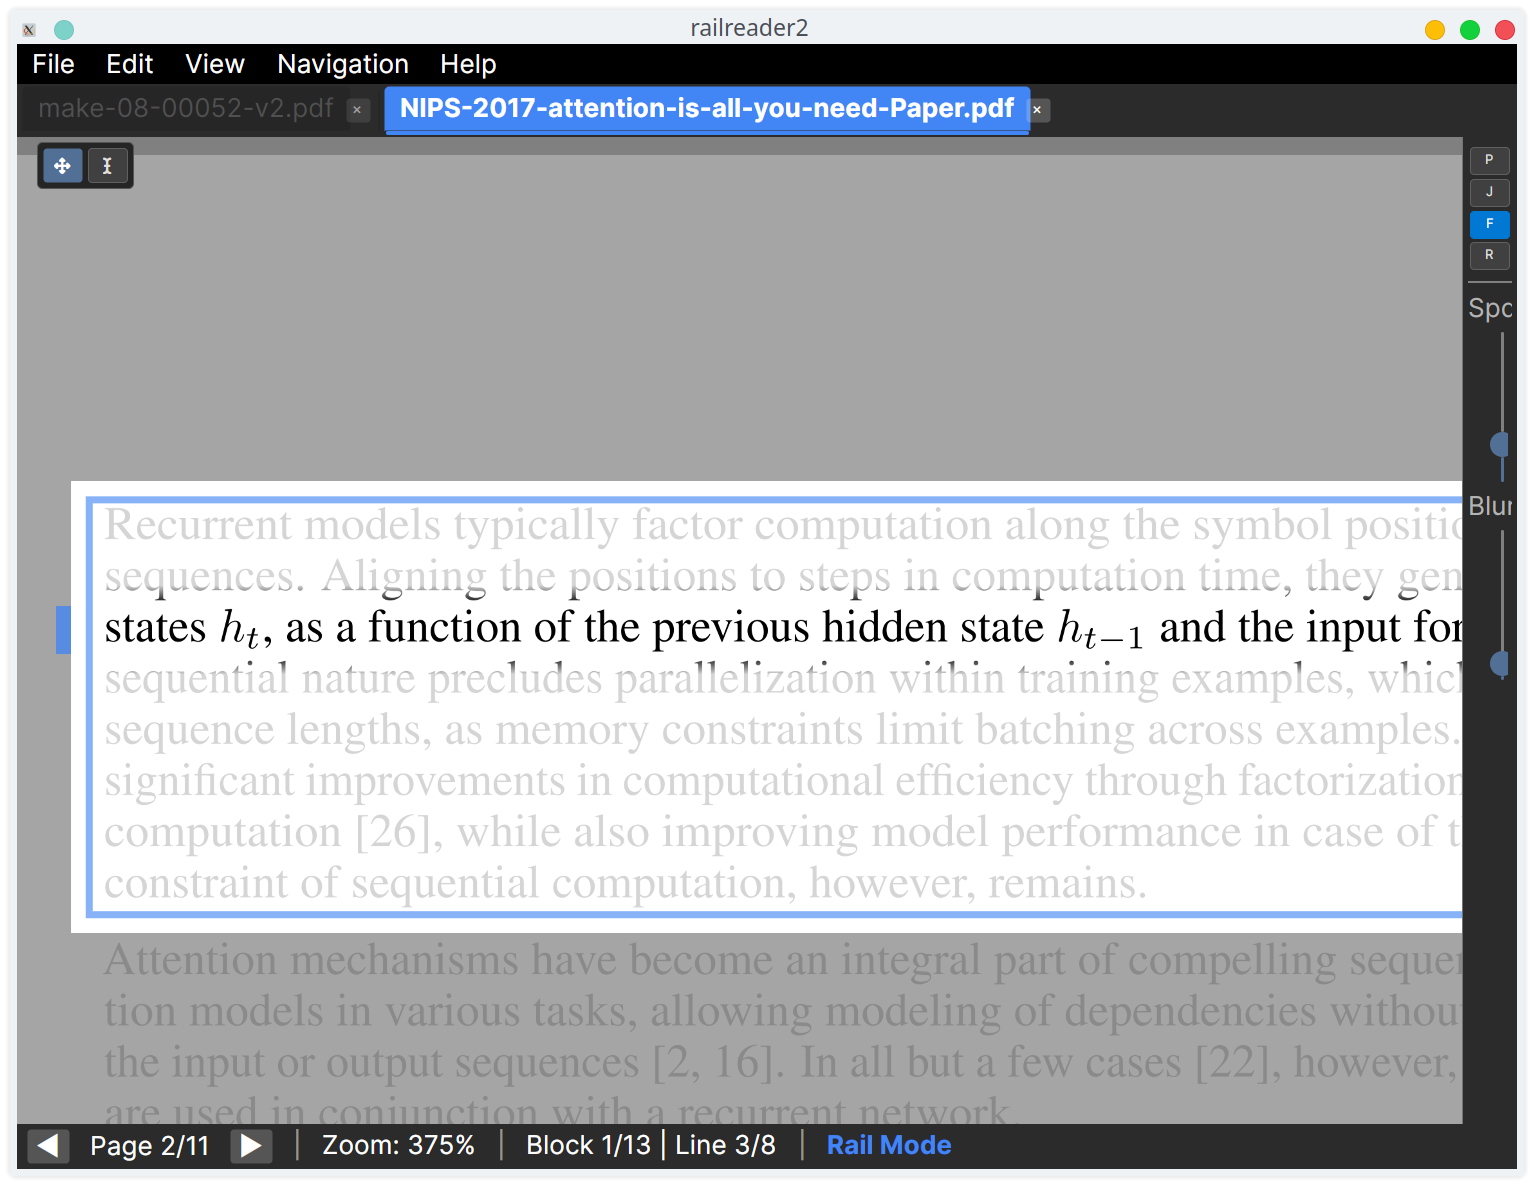
Toggle with the F key, the F button on the rail toolbar, or in Settings → Rail Reading.
Dim intensity is adjustable from 0 (off) to 1 (maximum). The padding around the active line
(how much extra space stays fully visible) is also configurable.
Line highlight tint
The active line in rail mode can have a configurable colour tint applied as an overlay.
This makes the current line stand out more clearly, especially at high magnification.
Press H to toggle the line highlight independently of line focus dim.
Choose from five presets in Settings → Rail Reading:
- Auto — Adapts to the active colour effect (amber for Amber, green for HighContrast/HighVisibility, etc.)
- Yellow — Warm yellow highlighter
- Cyan — Cool cyan tint
- Green — Soft green tint
- None — No tint — line is highlighted by dimming only
Opacity is adjustable from 0.0 (invisible) to 1.0 (fully opaque). The default is Auto at 25% opacity.
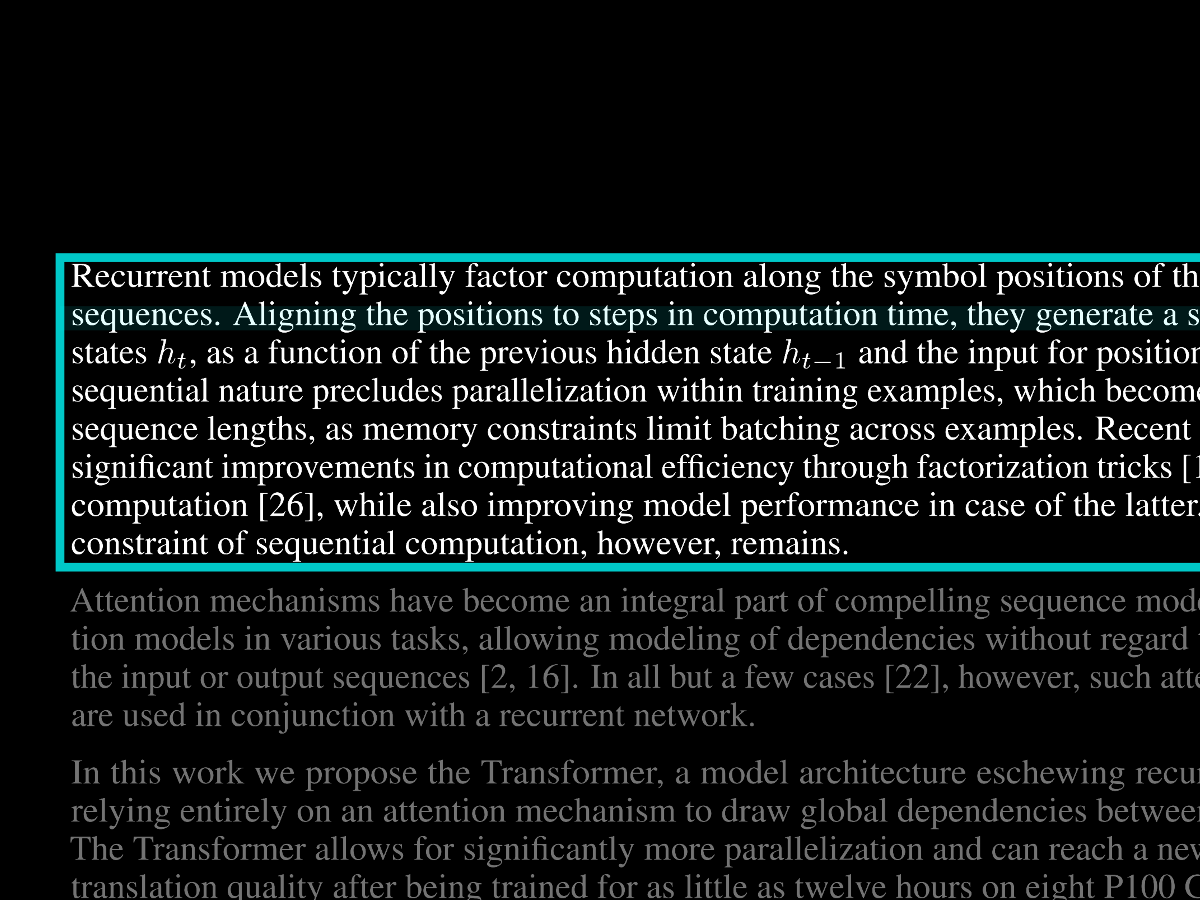
Colour Effects
Four GPU-accelerated colour filters are available, applied only to PDF content (not the UI).
Access via View → Colour Effect, Settings → Appearance, or press
C to cycle through effects on the active tab.
- Amber Filter: Warm tint that reduces blue light and perceived haze. Good for extended reading.
- High Contrast: White-on-black rendering with an S-curve for maximum contrast. Reduces glare.
- High Visibility: Yellow-on-black for maximum legibility at the cost of colour information.
- Invert: Simple colour inversion for dark backgrounds.
Each tab keeps its own colour effect independently — you can have one PDF in Amber and another in High Contrast. The per-tab effect is saved with the reading position and restored when you reopen the file.
Each effect has adjustable intensity (0.0 to 1.0). Rail mode overlay colours automatically adapt to the active colour effect for readable contrast.
C to quickly cycle through colour effects. The
status bar briefly shows the active effect name.
Search
Press Ctrl+F to open the Search section of the side panel (one of the
accordion sections, alongside Outline, Bookmarks, Index, and Comments). Type your query — results
appear automatically after a brief debounce; clicking a result jumps to the match and hands keyboard focus back to the page.
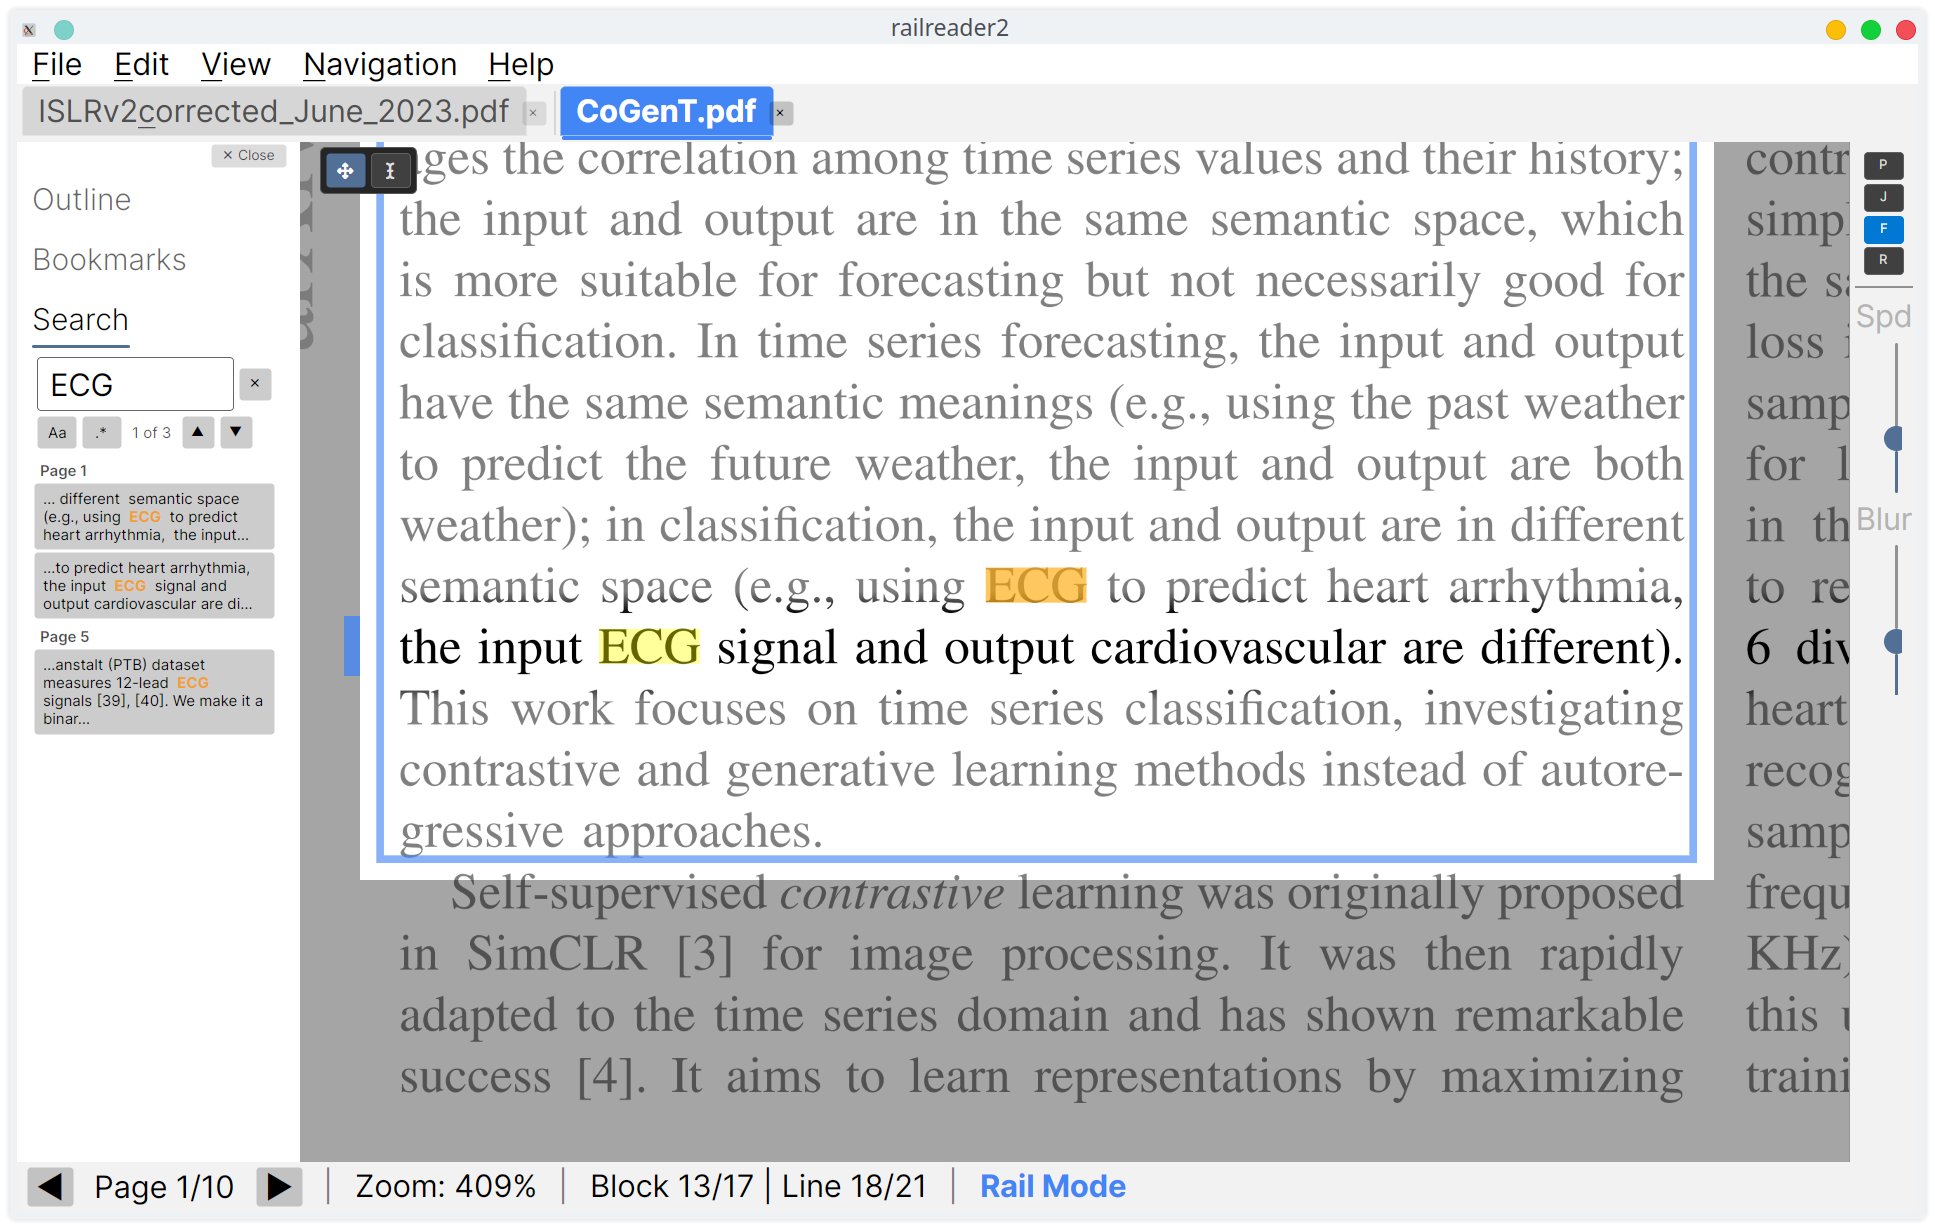
- Results panel: Matches are grouped by page with text snippets showing the match term in context (bolded). Click any result to jump directly to that match.
- Navigate matches:
Enter/Shift+Enterin the search input,F3/Shift+F3globally, or the arrow buttons in the panel. - Case sensitivity: Toggle with the
Aabutton. - Regex: Toggle with the
.*button for regular expression search. - Match count: The panel shows the current match index and total count (e.g. “3 of 42”).
- Clear: Click the clear button (×) to remove all highlights and results, or press
Escape.
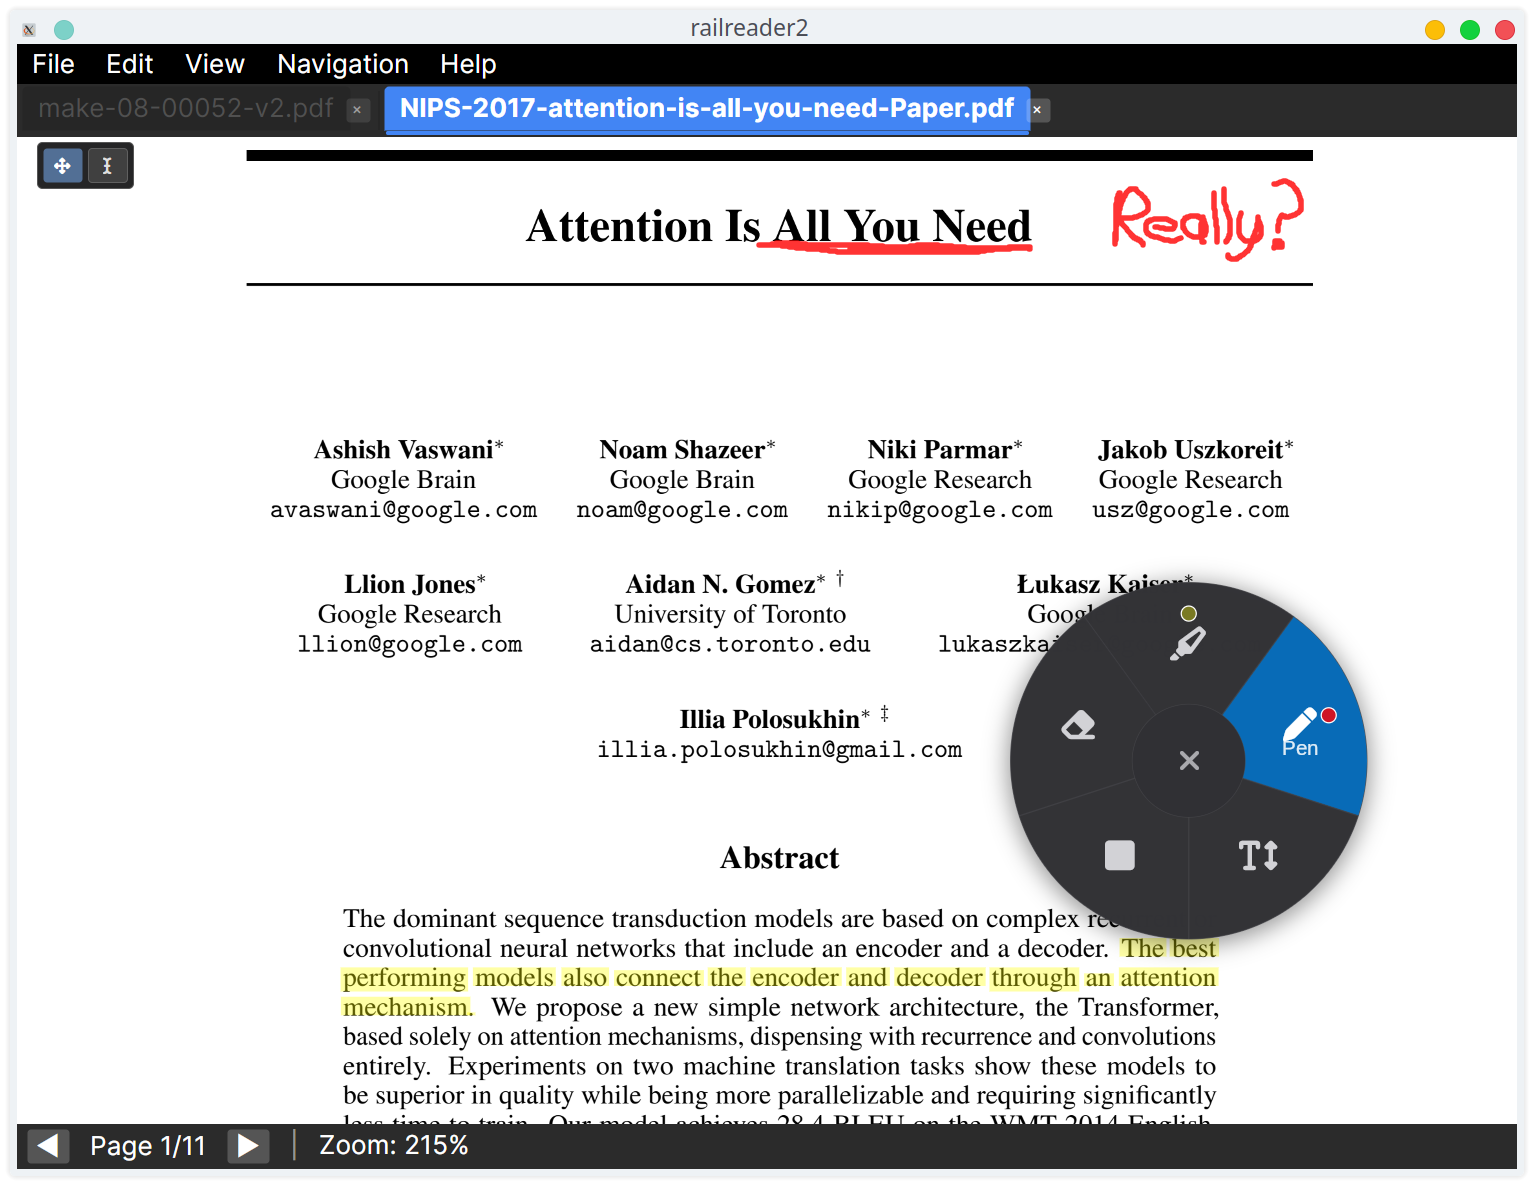
Annotations
Right-click anywhere on the page to open the radial menu with five annotation tools:
- Highlight (
1) — Click and drag over text to highlight. Uses character-level detection for precise selection. Choose from yellow, green, or pink via the colour ring. - Pen (
2) — Freehand drawing. Choose stroke thickness (thin/normal/thick) via the thickness ring, and colour (red/blue/black) via the colour ring. - Rectangle (
3) — Draw rectangular outlines or filled regions. Choose stroke thickness and colour (blue/red/black) via the radial menu rings. - Text Note (
4) — Click to place a note. Shows as a small folded-corner icon; click the icon in browse mode to expand/collapse the popup. Click an existing note in Text Note mode to edit. - Eraser (
5) — Click on an annotation to remove it.
Tool cursors
Each annotation tool shows a distinct mouse cursor so you always know the active mode:
- Highlight, Pen, Rectangle, Text Note — crosshair cursor
- Eraser — no-entry cursor
- Text Select — I-beam cursor
- Browse (no tool) — default arrow cursor
Radial menu rings
The radial menu has up to three rings:
- Inner ring — tool selection (always visible)
- Middle ring — stroke thickness: thin, normal, thick (shown for Pen and Rectangle). Displayed as size-varied circles.
- Outer ring — colour selection (shown for Highlight, Pen, and Rectangle)
Tap a segment to expand its rings. Selecting a thickness keeps the menu open so you can also pick a colour. Selecting a colour or clicking outside the rings activates the tool and closes the menu. A small indicator dot on the segment shows the currently active colour.
Annotation z-order
Annotations are drawn in a fixed z-order: highlights appear below freehand strokes and rectangles, which appear below text notes. Within each tier, annotations are drawn in the order they were created.
Popup notes
Text notes display as a compact folded-corner icon (16px). In browse mode, click the icon to expand a floating popup showing the full note text with word wrapping. Click again to collapse.
Select, move, and resize
In browse mode (no annotation tool active), click on any annotation to select it (shown with a dashed blue outline). Drag a selected annotation to move it. For freehand annotations, 8 resize handles appear on the bounding box — drag a handle to scale proportionally. All move and resize actions support undo/redo.
Delete selected annotation
Press Delete or Backspace in browse mode to remove the selected annotation.
This uses the same undo-supported removal as the eraser.
Undo and redo
Ctrl+Z undoes the last annotation action (including moves, resizes, and deletions).
Ctrl+Y or Ctrl+Shift+Z redoes. Each tab has an independent undo/redo stack.
Persistence
Annotations are saved automatically to internal storage. They load automatically when you reopen the file. When the same PDF is open in multiple tabs, all tabs share the same annotation data — edits in one tab are immediately visible in the other, with independent undo/redo stacks per tab.
Export
Use File → Export with Annotations to create a new PDF with annotations rendered into the pages. The original PDF is not modified.
Use File → Export Annotations as JSON to save all annotations for the current document as a standalone JSON file. This is useful for sharing with other RailReader2 users, backup, or programmatic access to annotation data.
Use File → Import Annotations… to import annotations from a JSON file. Imported annotations are merged with any existing annotations on the active document — your annotations are preserved, and the imported ones are added alongside them. Duplicate bookmarks (same name and page) are skipped.
PDF Links
Clickable links embedded in PDF documents are fully supported.
Internal links (cross-references)
Clicking an internal link — such as a citation reference, figure number, table of contents entry, or equation reference — navigates directly to the target location. The view scrolls to the exact position specified by the link destination, not just the page. This works in both browse mode and rail mode. In rail mode, links take priority over block-snapping.
External links (URLs)
Clicking an external link (a URL) opens a confirmation dialog showing the full URL. Click
Open to launch it in your default browser, or Cancel to dismiss.
Only http:// and https:// URLs are allowed; other schemes are blocked
for security.
Back and forward
After following a link or jumping to a bookmark, press Alt+Left or
` (backtick) to go back. Press Alt+Right to go forward.
Each tab maintains its own independent navigation history. The back button in the
bookmarks panel also works.
Hover feedback
When the mouse hovers over a clickable link, the cursor changes to a hand pointer. This works in browse mode (when no annotation tool is active).
Text Selection
The floating toolbar in the top-left corner provides three modes:
- Browse — Default pan mode.
- Text Select — Click and drag to select text. Selection uses character-level bounding boxes for precise results.
- Copy — Appears when text is selected. Click to copy, or use
Ctrl+C.
The active mode is shown with a blue highlight on the toolbar button. Press Escape
to cancel selection and return to browse mode.
Bookmarks
Press B to bookmark the current page, or click + Add Bookmark
in the bookmarks panel. A dialog lets you name the bookmark (pre-filled with "Page N").
Managing bookmarks
Press Ctrl+Shift+B to open the Bookmarks section of the side panel.
Each bookmark shows its name and page number.
- Navigate: Click a bookmark to jump to that page (zoom resets to fit the page).
- Rename: Click the Rename button on a bookmark to change its name.
- Delete: Click the Delete button to remove a bookmark.
- Back: After navigating to a bookmark, a “Back to previous location”
button appears at the top of the list. Click it or press
`(backtick) to return to where you were.
Duplicate handling
If you bookmark a page that already has a bookmark, the existing bookmark's name is updated instead of creating a duplicate.
Persistence
Bookmarks are stored in the same annotation file as highlights, notes, and other annotations. They persist across sessions automatically.
Index Pane
Press Ctrl+Shift+I to open the Index pane —
a browsable index of all figures, tables, and equations detected by the layout analysis model.
It is one of the side-panel accordion sections (alongside Outline, Bookmarks, Search, and Comments).
Background scanning
RailReader2 progressively analyses all pages in the background when idle. As pages are scanned, detected figures, tables, and equations appear in the pane. A progress indicator shows how many pages have been scanned (e.g., “12 of 20 pages scanned”). Background scanning pauses automatically during rail mode to avoid interfering with reading.
Scan All
Background analysis only reaches pages near where you have been reading. To index the entire document at once, click Scan All at the top of the pane — it sweeps every page for figures, tables, and equations and reports progress as it goes. The result is kept with the document, so switching tabs and back does not lose it.
Browsing entries
Each entry shows a thumbnail crop for figures and tables, or extracted text content for equations (Unicode math symbols from the PDF text layer). Use the Figures, Tables, and Equations toggle buttons at the top to filter by category. Click any entry to navigate to that page, or right-click it to open it in the portal pop-out window — a quick way to park a figure on a second monitor while you keep reading; Lock it there to keep it pinned.
Comments
The side panel's Comments section gathers every text note and reviewer comment in the document into one scrollable list, so you can read or jump between them without scrolling the pages.
- Sources: your own text-note annotations and in-PDF reviewer comments — comments authored in other PDF tools (Acrobat, Preview, …) and embedded in the file — appear together.
- Filter: use the All / Reviewer / Yours filter at the top to narrow the list by source.
- Jump: click an entry to navigate to its page; focus returns to the page so you can keep scrolling.
- Review state: for in-PDF reviewer comments, you can change the review state inline from the list.
Portals
A portal links a reference in the text — a “see Figure 3”, a “cf. Table 2”, an “(Eq. 7)” — to the figure, table, or equation it points to. Once linked, the target stays in view while you rail-read past the reference, so you never have to scroll away from the paragraph to see what it cites.
The linked target appears in the side panel's Portals section, and — optionally — in a detachable, always-on-top pop-out window you can drag to a second monitor.
Creating a portal
Right-click a detected block on the page and choose Create Portal — Keep This Block In View While Reading. Or use the two-step Set as Portal Target → Link Target to Current Paragraph when it is easier to mark the figure first and find the reference afterwards.
Sources are line-precise: the link fires at the exact line you were on, so several references in one paragraph (line 2 → Figure 3, line 8 → Figure 4) each surface their own target in turn. The shown target stays pinned until you reach a different portal's source, so it never flickers as you scroll.
On-page markers
Subtle, always-on markers show where portals are anchored on the current page: a small gutter dot beside each source line and a corner badge on each target block. The currently-shown portal is drawn accented. Click a marker to act on it — a source jumps to (shows) its target, a target jumps back to its source; a marker that stands for several portals opens a chooser.
Pop-out window
Click Pop out ↗ in the Portals pane (or click the docked preview) to detach the target into a floating, borderless, always-on-top window — useful on a multi-monitor setup. Drag its top bar to move it, the corner grip to resize; scroll to zoom and drag to pan inside it, double-click to fit. The Pin toggle controls always-on-top, Lock freezes the current target so reading on (or an auto-pin) won't replace it until you unlock, and Dock returns it to the panel. Its size and position are remembered.
Temporary peek
To glance at a block without saving a link, right-click it and choose Open in Portal (Temporary) — or right-click any entry in the Index pane. It opens in the pop-out window only, leaves any saved portal's tracking untouched, and dismisses itself once you read on (unless you Lock it).
Managing portals
The Portals pane lists every portal in the document. Rename a portal inline, click Go to source to jump to and frame its reference, or Delete to remove it. Portals are saved per-document in a sidecar keyed by the PDF's path, so they persist across sessions.
Acknowledgement: the portal concept — and the name — is borrowed from Sioyek, a PDF reader for research papers whose Portals feature inspired this one.
Copy as LaTeX (VLM)
Press Ctrl+L to send the current rail block to a Vision Language Model and
copy the result to the clipboard. You can also Ctrl+right-click any detected
block to open a context menu with Copy as LaTeX,
Copy as Markdown, Copy Description, and
Copy Image options — the same four are on the
Edit menu (Copy Block as LaTeX / Markdown / Description / Image),
acting on the current rail block. The Ctrl+L shortcut auto-selects
the action by block type: equations → LaTeX, tables → Markdown,
figures → description.
Setup
Open Settings > VLM and configure an OpenAI-compatible API endpoint. Use Test Connection to verify your setup.
Structured JSON output
Under Settings > VLM there's a Use structured JSON schema
responses checkbox (off by default). Enabling it forces capable models
(GPT-4o, Qwen2.5-VL, Gemini) to return a JSON object matching a strict schema,
producing cleaner output — no stray $$ wrappers, code fences, or
prompt echoes. Some local or OCR-specialised models don't reliably support JSON schema
and may return truncated output; disable the checkbox in that case.
Recommended models
- Cloud (OpenAI):
gpt-5.4-nano-2026-03-17— best accuracy for equations and tables. Requires an API key. Note: sends images to external servers. - Local (Ollama):
qwen2.5-vl:7b— good general-purpose vision model, no data leaves your machine - Local (vLLM + LightOnOCR):
lightonai/LightOnOCR-2-1B— specialised OCR model, fast local inference
See the VLM setup guide for detailed instructions on all three options.
CLI Tool
RailReader2 ships a standalone headless CLI for automated PDF extraction.
Download railreader2-cli-linux-x64.tar.gz (Linux) or
railreader2-cli-win-x64.zip (Windows) from
GitHub Releases,
then extract the archive. On Linux, make the binary executable
with chmod +x RailReader2.Cli.
ONNX model
The CLI uses the Docling Heron-INT8 ONNX layout model by default, with PP-DocLayoutV3
available as an alternative. If the GUI is installed, the CLI finds the models automatically
from the shared cache. If the GUI isn't installed, download the models by running
./scripts/download-model.sh from source. The structure command
works without the model but skips layout analysis.
render — export pages as PNG
Renders PDF pages as PNG images, with optional colour effects and annotation overlay.
railreader2-cli render <pdf> [options]| Option | Description |
|---|---|
--pages <range> | Page range, e.g. "1,3,5-10" (default: all) |
--dpi <int> | Render DPI (default: 300) |
--effect <name> | Colour effect: none, highcontrast, highvisibility, amber, invert |
--intensity <float> | Effect intensity 0.0–1.0 (default: 1.0) |
--annotations | Burn annotations into rendered pages |
--output-dir <path> | Output directory (default: ./screenshots) |
# Render first 5 pages with amber filter
railreader2-cli render paper.pdf --pages 1-5 --effect amber --output-dir ./out

# Render all pages with annotations baked in
railreader2-cli render paper.pdf --annotations --dpi 150
structure — extract document structure
Extracts the PDF outline (table of contents), ONNX layout blocks, and per-block text as JSON.
railreader2-cli structure <pdf> [options]| Option | Description |
|---|---|
--output <path> | Output JSON file path (default: stdout) |
--include-text | Include extracted text per layout block |
--analyze | Run ONNX layout analysis to detect blocks |
--pages <range> | Page range for analysis (default: all) |
# Full structure with layout analysis and text
railreader2-cli structure paper.pdf --analyze --include-text --output structure.json

# Just the outline (no model needed)
railreader2-cli structure paper.pdf
annotations — export annotations
Exports annotations as rich JSON (with extracted text, layout block correlations, and nearest section headings) or as an annotated PDF.
railreader2-cli annotations <pdf> [options]| Option | Description |
|---|---|
--output <path> | Output file path (default: stdout for JSON) |
--format <json|pdf> | Export format (default: json) |
--include-text | Extract text under each annotation |
--include-blocks | Correlate annotations with layout blocks (implies ONNX analysis) |
# Rich JSON export with text and layout context
railreader2-cli annotations paper.pdf --include-text --include-blocks --output annotations.json

# Export as annotated PDF
railreader2-cli annotations paper.pdf --format pdf --output paper.annotated.pdf
vlm — transcribe blocks via a vision LLM
Sends detected equation, table, and figure crops to an OpenAI-compatible vision API and writes the transcriptions as JSON. Equations become LaTeX, tables become Markdown, figures become one-sentence descriptions. Uses the same endpoints as the GUI's Copy as LaTeX feature (OpenAI, Ollama, vLLM, LMStudio, etc.).
railreader2-cli vlm <pdf> [options]| Option | Description |
|---|---|
--classes <list> | Comma-separated subset: equation, table, figure |
--all | Shortcut for all three classes |
--pages <range> | Page range (default: all) |
--page <n> --block <i> | Transcribe a single block by page + block index |
--from-structure <path> | Reuse an existing structure --analyze JSON instead of re-running ONNX |
--endpoint <url> / --model / --api-key | Override AppConfig VLM settings (API key also read from $OPENAI_API_KEY) |
--equation-* / --table-* / --figure-* | Per-class endpoint/model/api-key overrides for mixed routing |
--prompt-style <style> | instruction (default) or ocr |
--concurrency <n> | Parallel VLM requests (default: 1) |
--dump-crops <dir> | Write the PNG crops to disk (useful for debugging) |
--no-structured-output | Disable JSON schema response format (default: on) |
--no-html-to-md | Keep HTML tables as-is (default: convert to Markdown) |
--output <path> | Output JSON file path (default: stdout) |
# Transcribe every equation and table in a paper to LaTeX/Markdown
railreader2-cli vlm paper.pdf --classes equation,table \
    --endpoint https://api.openai.com/v1 --model gpt-5.4-nano-2026-03-17 \
    --output transcriptions.json

# Mixed routing: local Ollama for equations, OpenAI for figures
railreader2-cli vlm paper.pdf --classes equation,figure \
    --equation-endpoint http://localhost:11434/v1 --equation-model qwen2.5-vl:7b \
    --figure-endpoint https://api.openai.com/v1 --figure-model gpt-5.4-nano-2026-03-17 \
    --output rich.json

# Reuse a pre-computed structure JSON (skip ONNX)
railreader2-cli structure paper.pdf --analyze --output structure.json
railreader2-cli vlm paper.pdf --from-structure structure.json --all --output vlm.json
export — convert PDF to Markdown
Exports a PDF to structured Markdown using layout analysis, VLM transcription, and annotation extraction. Heading hierarchy is resolved by matching detected heading blocks against the PDF outline tree. Degrades gracefully depending on available tools.
railreader2-cli export <pdf> [options]| Option | Description |
|---|---|
--output <path> | Markdown output file (default: stdout) |
--pages <range> | Page range (e.g. 1,3,5-10) |
--no-page-breaks | Omit page break markers (---) between pages |
--no-vlm | Disable VLM transcription (placeholders instead) |
--no-annotations | Exclude annotations from output |
--figure-dir <dir> | Save figure PNGs and reference them in the Markdown |
--endpoint / --model / --api-key | VLM overrides (same as vlm command) |
--concurrency <n> | Parallel VLM requests (default: 2) |
--prompt-style <style> | instruction (default) or ocr |
--no-structured-output | Disable JSON schema response format |
# Basic export (text + headings, equations/figures as placeholders)
railreader2-cli export paper.pdf --no-vlm --output paper.md

# Full fidelity with VLM (LaTeX equations, Markdown tables, figure descriptions)
railreader2-cli export paper.pdf \
    --endpoint https://api.openai.com/v1 --model gpt-5.4-nano-2026-03-17 \
    --output paper.md

# Export with figure images saved to disk
railreader2-cli export paper.pdf --figure-dir ./figures --output paper.md
Graceful degradation: With ONNX + VLM, you get full fidelity (headings, LaTeX, pipe tables, figure images). With ONNX only (no VLM), equations and figures become placeholders and tables render as code blocks. Without either, the output is plain text per page with heading markers from the PDF outline.
Settings
Press Ctrl+, or use the menu to open Settings. Changes take effect immediately
and are saved automatically to the config file.
Appearance
- UI Font Scale: Adjust the size of all UI text (default 1.25x).
- Dark Mode: Switch the UI to a dark theme. Takes effect immediately.
- Motion Blur: Toggle and adjust intensity of directional blur during scroll/zoom.
- Colour Effect: Select and configure the active colour filter (applies globally via Settings; use
Ckey for per-tab cycling).
Rendering
- Render Quality: Pick a render-DPI preset — Ultra (800 DPI), Quality (600), High (525, the default), Balanced (450), Medium (400), Performance (350), or Custom. Higher presets re-rasterise pages at a greater DPI cap for sharper text and deeper zoom, at the cost of more memory and more frequent re-renders; lower presets favour fluidity. The change applies to the open page immediately — no restart.
- Custom (Max render DPI / Tier step): When Custom is selected, set your own maximum DPI (150–1200) and tier step (the DPI granularity at which the page re-rasterises). Values are clamped to the supported range.
Rail Reading
- Zoom Threshold: Zoom level at which rail mode activates (default 3.0x).
- Snap Duration: Duration of line-snap animations in milliseconds.
- Scroll Speed: Start and max speed for horizontal hold-to-scroll.
- Ramp Time: Seconds to reach max scroll speed from start.
- Pixel Snapping: Quantise camera to pixel grid to reduce text shimmer.
- Line Focus Dim: Toggle and set intensity. Adjust the focus padding (extra space around the active line that stays fully visible, 0–0.5).
- Line Highlight Tint: Choose a colour tint for the active line (Auto, Yellow, Cyan, Green, None) and set opacity.
- Jump Distance: Percentage of visible width for jump mode (5–80%).
Auto-Scroll
- Line Pause: The per-line reading beat — pause held at the end of every line before moving to the next (ms, 0 to disable).
- Park On: Which block types auto-scroll parks on when it reaches them (headings, equations, tables, figures by default). Unchecked types flow through like prose; column and page breaks always park.
- Enable auto-scroll trigger / Trigger delay: Optionally auto-start auto-scroll after holding
D/Rightfor the set delay.
Advanced
- Layout Model: Choose between Docling Heron-INT8 (default, bundled, ~66 MB) and PP-DocLayoutV3 (alternative, ~50 MB). See the layout model guide for installation and trade-offs.
- Custom Layout Model: Optionally replace the built-in model with your own ONNX (PP-style I/O contract) + class-mapping JSON.
- Navigable Block Types: Choose which block types are navigable in rail mode. Toggling classes doesn't require re-running analysis.
- Centered Block Types: Choose which block types are horizontally centered when they are narrower than the viewport. By default, headings (paragraph_title, doc_title) are excluded so they stay left-aligned with surrounding text, while formulae and body text are centered.
- Analysis Lookahead: Number of pages to pre-analyze ahead (0 to disable).
Config file
Configuration is stored at ~/.config/railreader2/config.json (Linux) or
%APPDATA%\railreader2\config.json (Windows). You can edit it directly;
restart the app to apply changes.
Troubleshooting
RailReader2 writes a diagnostic log during each session. If you encounter a problem, the log helps developers understand what happened.
Exporting the log
- Help → Export Diagnostic Log… opens a save dialog to export a copy of the current session log.
- Help → About shows the log file path at the bottom of the dialog. Click the copy icon next to the path to copy it to the clipboard, then attach the file to a bug report.
Log file location
- Linux:
~/.config/railreader2/session.log - Windows:
%APPDATA%\railreader2\session.log - macOS:
~/Library/Application Support/railreader2/session.log
The log is overwritten at the start of each session. Old .log files are
automatically removed after 7 days by the cleanup service.
Controls & Icons
The toolbar, the right-click annotation menu, and the panel controls use a set of crisp Lucide vector icons that inherit the theme text colour and scale with the UI font size. Here is what each one does.
| Icon | Name | Action |
|---|---|---|
| Toolbar | ||
| Browse / Pan | Pan the page and click to navigate — the default mode | |
| Text Select | Select text on the page to copy | |
| Copy | Copy the selected text (Ctrl+C) | |
| Annotate | Enter annotation mode (Ctrl+E) | |
| Annotation tools (right-click radial menu) | ||
| Highlight | Highlight text (yellow / green / pink) | |
| Pen | Freehand drawing (red / blue / black) | |
| Rectangle | Draw a rectangle outline | |
| Text note | Drop a collapsible popup note | |
| Eraser | Erase annotations under the cursor | |
| Thickness | Stroke thickness for the pen and rectangle (thin / normal / thick) | |
| Panel & navigation | ||
| Sidebar | Show or hide the side panel (left of the tab strip) | |
| Add bookmark | Bookmark the current page (Bookmarks section) | |
| Back | Return to your previous location after a jump | |
| Pause | Pause auto-scroll (rail toolbar) | |
| Clear / Close | Clear the search, or close a popup note | |
| Overflow | List all open tabs when the tab bar is full | |
Keyboard Shortcuts
| Key | Action |
|---|---|
| General | |
| Ctrl+O | Open file |
| Ctrl+W | Close tab |
| Ctrl+Tab | Next tab |
| Ctrl+Q | Quit |
| Ctrl+, | Settings |
| Ctrl+M | Toggle minimap |
| Ctrl+Shift+M | Toggle margin cropping |
| Ctrl+Shift+O | Open Outline section |
| Ctrl+Shift+B | Open Bookmarks section |
| Ctrl+Shift+I | Open Index section (figures / tables / equations) |
| Ctrl+L | Copy block as LaTeX (VLM) |
| Ctrl+G | Go to page |
| F1 | Keyboard shortcuts dialog |
| F11 | Toggle fullscreen |
| Navigation | |
| PgDn / PgUp | Next / previous page |
| Home / End | First / last page |
| Space | Next line (rail) or next page |
| + / - | Zoom in / out |
| 0 | Fit page to window |
| Shift+D | Toggle debug overlay |
| Rail Mode | |
| Down / S | Next line |
| Up / W | Previous line |
| Right / D | Scroll forward (hold) |
| Left / A | Scroll backward (hold) |
| Shift+Right / Shift+Left | Short jump — half distance (jump mode) |
| Home / End | Line start / end |
| P | Toggle auto-scroll (semi-automatic; D/S to continue when parked) |
| J | Toggle jump mode |
| B | Add bookmark for current page |
| Alt+Left / ` (backtick) | Navigate back |
| Alt+Right | Navigate forward |
| C | Cycle colour effect on active tab |
| F | Toggle line focus dim |
| H | Toggle line highlight |
| [ / ] | Adjust speed or jump distance (±5) |
| Ctrl+[ / Ctrl+] | Fine adjust speed or jump distance (±1) |
| Shift+[ / Shift+] | Adjust blur intensity (±0.05) |
| Ctrl+Shift+[ / ] | Fine adjust blur intensity (±0.01) |
| Ctrl+Drag | Free pan/zoom in rail mode (release to snap back) |
| Click | Jump to block |
| Search & Annotations | |
| Ctrl+F | Open search panel |
| F3 / Shift+F3 | Next / previous match |
| 1 / 2 / 3 / 4 / 5 | Highlight / Pen / Rectangle / Text Note / Eraser |
| Right-click | Open radial menu (thickness + colour rings) |
| Ctrl+Z | Undo |
| Ctrl+Y | Redo |
| Delete / Backspace | Delete selected annotation (browse mode) |
| Ctrl+C | Copy selected text |
| Escape | Cancel tool / close search / stop auto-scroll / exit fullscreen |